BITES'N CRAFTS
  • Home
  • Recipes
  • Travel
  • Home & Garden
  • About us
  • Home
  • Recipes
  • Travel
  • Home & Garden
  • About us

BITES'N CRAFTS

FOOD, TRAVEL, HOME & GARDEN

Bread & Buns

Pita bread

by Marta Hilmar March 6, 2016
written by Marta Hilmar March 6, 2016
Pita bread

Pita_bread_1

Remember those Pita pockets with chili sauce? I promised the recipe for Pita, so it is coming. In case you have not heard about Pita before… Pita is round pocket bread. You can stuff it with your favorite meat, salad, sauces, etc.

Is it really worth making pita bread at home? Absolutely. It is easy, and fast, and the result is fresh and flavorful bread.

Pita_bread_2

The “pocket” in Pita bread is created by steam, which puffs up the dough. As the bread cools and flattens, a pocket is left in the middle.  You can make pita bread either in the oven or on the stove. In the oven, pitas puff up more grandly. The result is softer pockets, but they stay pale-colored and fairly mild-tasting. On the stove, puffing is not that extensive, but pockets are a little bit tastier with crunchy spots on the surface of the dough. To make the best of both worlds, I made my Pitas in the oven, on a cast-iron pan. They puffed perfectly and I also gained crunchy spots on the surface 😉

Pita_bread_3


Makes8 pockets

TimePreparation and baking: about 2 h

Ingredients

  • 230 ml water
  • 10 g yeast
  • 1/2 tsp sugar
  • 35 g whole wheat flour
  • 300 g all-purposed flour
  • 1 tsp salt
  • 2 tbsp olive oil

1

Mix lukewarm water, sugar and yeast together, and let it sit for about five minutes until the yeast is dissolved.
  • 230 ml water
  • 10 g yeast
  • 1/2 tsp sugar

2

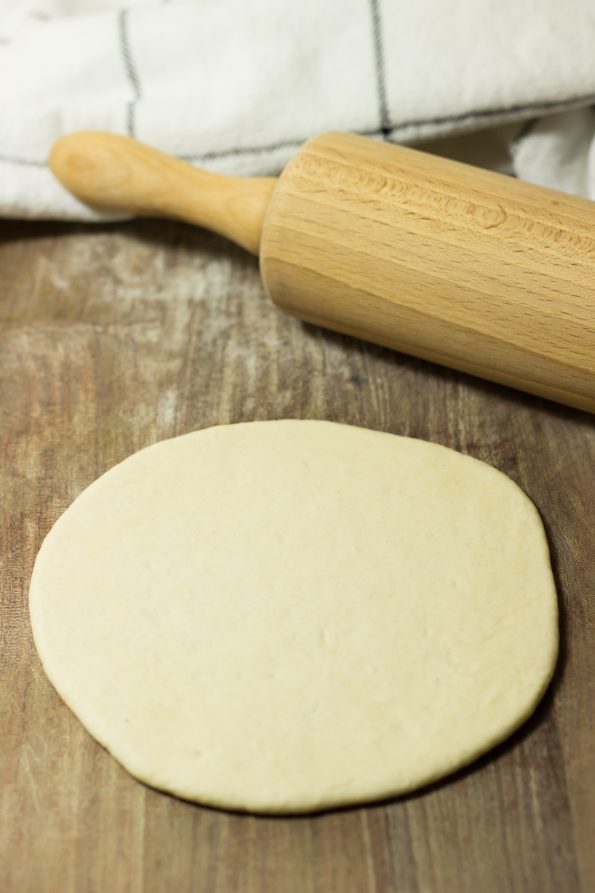
In the other bowl add salt, whole wheat flour and 50 g of all-purposed flour. Combine with yeast mixture. Cover with a damp towel and put the bowl in a warm place for about 15 minutes. Add salt, olive oil and nearly all remaining all-purpose flour, reserving some for dusting the table. Stir until mixture forms a shaggy mass. Dust with flour, then knead in bowl for about 8 minutes. The dough should be soft and a bit moist. Put the dough in a bowl and cover with plastic wrap or damp towel. Let the dough rest in a warm place for about an hour or until doubled in size.

  • 35 g whole wheat flour
  • 300 g all-purposed flour
  • 1 tsp salt
  • 2 tbsp olive oil

3

Divide the dough into 8 balls and flatten each piece into a thick disk. Sprinkle the pieces with a little flour and cover them with a plastic wrap or damp towel and leave for 10 minutes. Heat oven to 220 °C with the cast-iron pan on the bottom shelf. Take one ball and roll out, to the thickness little less then 0.5 cm, dusting with flour if necessary.

4

Place the flattened dough onto the hot pan. After 3 minutes the dough should be nicely puffed. Turn over with spatula and bake 2-3 minutes more. The pita should be pale, with a few brown spots. Cover the Pitas with the towel so they stay soft. Repeat the process with the rest of the of the dough balls.

Pita_bread_4

Related

bakingbreadflourpita
0 comment
0
FacebookPinterest
Marta Hilmar

previous post
Baking course at Falslevgård Mølle
next post
Green Risotto with Spinach and Peas

You may also like

Rye Mini Rolls

April 13, 2019

Naan Bread

April 30, 2016

Sweet Rolls with Jam

April 29, 2016

Baking course at Falslevgård Mølle

February 23, 2016

Billion black seeds on the table

December 13, 2015

They don’t taste so healthy, but…

December 6, 2015

You must log in to post a comment.

Categories

  • Appetizers
  • Asian
  • Bread & Buns
  • Breakfast
  • Desserts & Pastries
  • Mains and sides
  • Pasta, gnocchi, risotto…
  • Salad
  • Soups
  • Travel
  • Uncategorized
No images found!
Try some other hashtag or username
  • Facebook
  • Instagram
  • Pinterest

@2019 - All Right Reserved. Designed and Developed by PenciDesign


Back To Top